Sony a7R preflash and shutter delay measurements

As a photographer, one of the worst things that you can do is to take a picture of someone who has their eyes closed. That is often caused by the preflash of your flashgun, which occurs right before the main flash. The camera is using preflash to test and calculate the amount of light that the flash needs to put out. When there is a long delay between the preflash and the actual flash used to take the photo, the subject will have time to close their eyes, which is a natural reaction to a flash(or preflash, in this case).

So the ideal situation is the shortest possible time between flash and preflash. Of course, you could eliminate the preflash entirely, by doing the flash calculation yourself, or by letting the flash itself do the calculation, in manual mode, but that’s another post for another time. For now, we are looking at how long the Sony a7R takes between preflash and flash.

All cameras will have some kind of delay between the time that the button is pressed to take the picture, and when the picture actually gets shot, without using a flash. So how much no-flash delay does the a7R have, and how much time does the flash add to that delay? Imaging Resource has this to say about the no-flash delay: “When manually focused, the Sony A7R’s lag time only dropped to 0.261 second, which is a bit on the slow side for manual focus shutter lag. The Sony A7R’s prefocused shutter lag time was 0.163 second which while quick, is much slower than most DSLRs or CSCs.” http://www.imaging-resource.com/camera-reviews/sony/a7r/sony-a7rA6.HTM

To give you an idea of how slow that is, they measured the mirrorless Sony NEX-5N prefocused time to capture at 0.022 second(no flash involved). The a7R, with it’s mechanical shutter, is considerably slower, which is going to really increase the preflash to flash delay.

Measuring that delay can be done at home, by shooting video of the camera taking a picture, that uses the flash. It won’t be totally accurate, but you’ll get an approximate number. We already have video of that online, thanks to David Kilpatrick, over at http://www.photoclubalpha.com:  http://www.youtube.com/watch?v=yX9oXHnJZEs

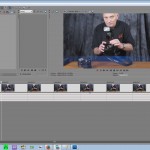
In the screen capture below, you can see individual frames from the video, that barely shows just when the preflash started, and much more obviously, when the actual flash happened, five frames later. There are five clean frames in between those events, and at 25 frames per second, it’s 5/25th of a second delay(two-tenths of a second). David shot several flash events in that tape, and the rest of them all had four clean frames between preflash/flash, which is 4/25th of a second, or .16 second delay. Compare that with the .163 second shutter delay that Imaging Resource measured, and you can see that the flash doesn’t add too much to the overall time-to-capture delay. The worst case scenario for preflash/flash delay appears to be almost 1/25th of a second. The mechanical shutter is actually what’s causing most of the delay.

Sony, a7R, flash, shutter, delay

Measuring the preflash-to-flash shutter delay, Sony a7R.

Dan Euritt

Wide Angle Camera Lenses on the Sony a7R

The Sony a7R is a 36MP full frame(35mm film size sensor) camera, that many photo enthusiasts purchased with the intention of mounting legacy and 3rd party camera lenses on. The picture quality is outstanding with just about any camera lens, but there can be issues with wide angle lenses, so we’ll highlight that issue in this post. To be more specific, wide angle rangefinder lenses are generally the most problematic, but even some standard wide angle camera lenses don’t work well on the Sony a7R. The focal ranges where these issues really show up is typically 24mm and wider, with the 35mm and up lens range being generally acceptable, with most lenses.

The problem can manifest itself as smeared corners, and/or out-of-focus blurry areas that cover the entire sides of the picture. The smeared corner issue will typically show up both before and after the infinity focus point. The OOF(out of focus) area problem is most noticeable after infinity focus, when shooting landscape pictures in particular. The OOF lens shots may look great when shooting subjects up close, but then be unacceptable for shooting big areas, that need sharp focus across the entire plane of the picture. The center of the picture is usually very sharp, in perfect focus, but then the picture falls apart gradually, starting about a third of the way in, from each side. This post will dwell on the latter problem in particular, using legacy film camera lenses, because they are cheap and plentiful.

There are a number of examples of this OOF area problem on the internet, but it’s not always noticeable, because the picture needs to be evaluated as it comes out of the camera, unprocessed, and at full size. Our first sample picture was taken by a Kiron 28mm f2.o lens, which is a nice piece of manual focus glass. This Colorado landscape shot was taken by uhoh7, who returned his Sony a7R, and purchased the Sony a7 instead. Look at the mountain range, and how only the middle third of it is in sharp focus, while the sides of the picture are very OOF.

If your bandwidth is limited, the thumbnail pic links to a 100% cropped version, edited down to three narrow strips, that illustrates the problem clearly. The full-sized 12MB version is linked below the thumbnail:

Sony a7R Kiron 28mm f2 lens photo, smeared corners, blurry

http://www.flickr.com/photos/55299472@N07/11769495364/sizes/o/in/photostream/

Here is another example of the blurry sides problem, shot at f8 with a Sigma 24mm f2.8. This lens is no slouch, it got a 4.0 rating at photodo, tested on a crop sensor camera. The center is sharp, but the sides are very blurry at this aperture, so the picture was also shot at f11 and f16. Notice how the telephone wires on the left hand side are much cleaner by f16, but at the expense of slightly less resolution in the center. The reeds along the lake are also a good basis for comparison. *Make sure that your browser is set to display pictures at full size*:

sony-a7r-sigma-24mm-at-f8-f11-f16

Lens diffraction testing on the Sony a7R, using a Sigma 24mm f2.8 lens.

Not all 24mm/28mm prime lenses that are put on the Sony a7R show such a wide disparity in resolution, between the center and the sides, so you’ll have to evaluate your glass accordingly. You can find out more about when diffraction starts affecting resolution at http://www.cambridgeincolour.com/tutorials/diffraction-photography.htm Stay tuned to this website for further landscape lens testing, with a Pentax SMC 24mm 2.8 lens, and a Canon FDn 24mm 2.8.

Dan Euritt

Mounting Canon FDn lens to Sony a7R NEX adapter

Here is a quick post about mounting Canon FDn camera lenses to a Sony a7 a7R NEX e-mount adapter. The adapter being used is one of the cheap Fotasy units from overseas. Some of these NEX adapters have different labels on the adapter ring, for example, “lock” versus “close”, but the functionality is generally similar. Fotodiox is another lens adapter vendor.

The rotating rings on these cheap Canon FD/FDn adapters don’t necessarily lock the lens to the adapter flange, the lock function is actually done by the lock ring on the lens itself. For FDn lenses, there is a button on the lens ring that you have to push, before the lens can be rotated off of the adapter flange mount.

If you are new to Canon FD/FDn lenses, the first thing to know is that with an un-mounted FD/FDn lens, you can’t always control the lens aperture by rotating the aperture ring on the lens. The lens has to be mounted first, which is not usually the case with camera lenses manufactured by other companies, like Pentax, Nikon, etc. So if you are evaluating a Canon FD/FDn lens for purchase, for instance, be sure and at least take one of these cheap adapters with you, so that you can confirm the condition and operation of the aperture blades. The blades need to be free of oil, and they need to move easily.

The second thing to look out for is to make sure that the lens pin is engaged properly on the Sony a7R NEX e-mount adapter. With the cheap adapter shown below, the lens can be mounted with the pin on the wrong side of the actuator lever in the adapter, which means that the blades won’t move when you turn the aperture ring on the lens.

Fotasy-canon-fdn-lens-mount-to-sony-nex-a7r-adapter-emount

Dan Euritt

The pitfalls of putting advertising on your videos

I started putting video on the web back in the mid-’90’s, when the only codecs around were Cinepak(Quicktime), Windows Media(early), and MPEG-1. Youtube hadn’t even been dreamed of back then; you had to host your own videos. The content creation and encoding tools were very limited, and incredibly primitive. I left my job as a network administrator to become a video compressionist for a startup, and my new management didn’t have any idea how difficult it was to deliver quality content, when you are driving the encoding equivalent of a Model A.

Meanwhile, I was trying to find advertising to put on my content. One of the early forays into that arena was with instream.com; I was hand-editing every single web page, with complicated Windows Media parameters. The pay rate was favorable to begin with, but after a few weeks, I started noticing that they were only serving up preroll ads before every 2nd or 3rd video playback. A few months after that, they weren’t serving up any ads at all. A year later, and all of the hand-coding that I had done, that was pointed to their web server, was suddenly not working. My videos weren’t playing, and the company eventually disappeared. AOL now owns the URL, but there’s no website for it.

One of the more notable failed attempts that I experienced was with revver.com. They had some seed money, that they used to create a cool platform, and they were serving up ads. They had a good support forum, and noble intentions. So I started a blog for my content, hoping to automate the procedure with the Revver WordPress plugin. After awhile the problems with the platform weren’t being addressed, and the company got sold to someone who refused to honor the previous commitments that the company had made. A number of very upset content creators never got paid, and all of us had to rework our html and our video footage once again.

Fast forward to 2013. I once again gave my current content to a recent startup, named Blip.TV. They also had a good platform, and they paid on time. Last fall I got an automated email stating that I was being paid the balance of my Blip earnings, but nothing more. A few weeks later, I noticed that the content that I had deliberately chosen to give to Blip instead of Youtube, was no longer playing back from my websites. There was an error message in the Blip.TV video window, something about the terms of service? It seems that Blip.TV was bought out/merged/whatever with a company called Maker, that apparently has over 60,000 channels on Youtube. The Maker T.O.S. says that they want only web series, not quality niche video. One of the examples of the kind of content that they kept was video of a couple of guys dressed in white, squirting themselves down with some kind of liquid. I guess that someone thought that it was funny? I wasn’t very amused when Maker cut off my content streaming, without even the courtesy of an email to me. The content just suddenly disappeared, but at least I think that I got paid everything that I was owed.

I suspect that, in the end, Maker will go the way of Revver and instream.com. Like many these days, they are trying to hedge their bets against Youtube, the 800lb gorilla in the room. When I gave content to Blip.TV instead of Youtube, I was trying to do something similar, and now I’m paying for it. The lesson for you, the content creator, is that you always have to hedge your bets, and be prepared for the worst. You’ll have to re-encode content repeatedly over the years, and if you give any kind of content to Youtube, Facebook, whatever, the website page that those companies create with your content won’t belong to you.

Dan Euritt